• Home
  • Blog
  • Recipes
  • Sign-up
Menu

iwannabeacook

Street Address
Cincinnati, OH
Phone Number
Cooking Classes Milwaukee

Your Custom Text Here

iwannabeacook

  • Home
  • Blog
  • Recipes
  • Sign-up

Baking flour-based cookies

December 16, 2016 Samantha Mason

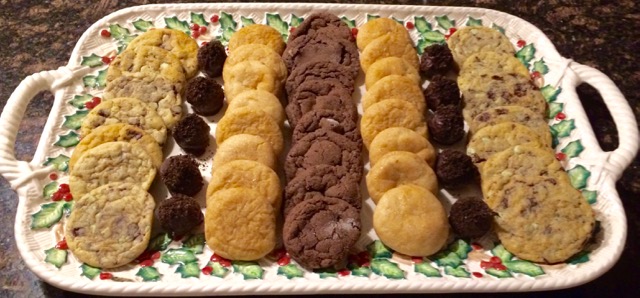
This blog focuses on the fundamentals of baking flour-based cookies. Each of the cookies above (please ignore the small candy!) follows the same basic pattern of baking cookies. No actual cookie recipe is followed in this blog, but after reading these instructions you will understand the template for baking cookies.

Read the recipe

It is very important in baking to follow the recipe amounts, so read the recipe carefully. Some recipes require refrigeration for one hour, overnight, or several days. Completely reading the recipe is important.

Assemble your ingredients

The next most important step is to assemble your ingredients and cooking equipment. Remember the term mise en place? There is nothing worse than being halfway through a recipe and realizing you are missing one or two ingredients. Out of brown sugar? Use white sugar and molasses. Out of vanilla? Use maple syrup. Out of flour? Seriously, go to the grocery, but first make sure you have all the other ingredients! Most ingredients have a workaround, but you don't want to stop in the middle of the recipe to Google a substitute. 

Preheat the oven?

Now that you understand the steps of the recipe and have all the ingredients assembled, let's talk about the best approach to making cookies. The first step in most cookie recipes is to turn the oven on so that it can properly heat. If you have to refrigerate your dough for any amount of time, then it is wasteful to turn the oven on as a first step. Know the timing of your recipe to know when to turn the oven on.

Room temperature

Make sure that anything cold is at room temperature unless otherwise noted in the recipe. Butter and eggs must be at room temperature. Use a rolling pin to whack the butter to hurry the process along. Add eggs to warm not hot water. Sometimes you want to bake cookies at the last minute and just can't wait. Measure out any refrigerated liquid like milk or cream.

The baking sheet

Prepare the baking sheet. Does it need to be buttered or lined? You will be happy to have the sheet ready when you've finished making the dough. If you need to butter a pan, use butter from the refrigerator. Warm butter coats the sheet with too much butter.

Dry ingredients

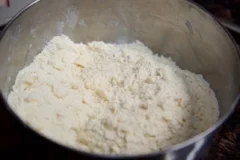
Since we are talking about flour-based cookies, we know that the recipe will have flour along with other dry ingredients. All of the dry ingredients need to be combined before being added to the recipe because you want each of the dry ingredients distributed evenly. So thoroughly mix all the dry ingredients in a bowl. It's a good habit to do this before starting the rest of the recipe.

Sifting the flour

Some recipes call for sifting the flour. Let's talk about why this is important and when to do it. From past discussions on flour, we know that flour has to be carefully measured especially when baking using the Spoon and level technique. Too much flour will make cookies dense and dry, too little will make the structure weak and spread too much.

Sifting the flour adds air and removes any clumped flour providing a smoother and lighter texture. Let's talk about the details of sifting. If a recipe calls for "2 cups flour, sifted," this means to measure the flour first and then sift it. If a recipe calls for "2 cups sifted flour," this means to sift the flour into a cup measure and level it off, repeating for the second cup. This distinction is slight, but very important. Read the recipe carefully.

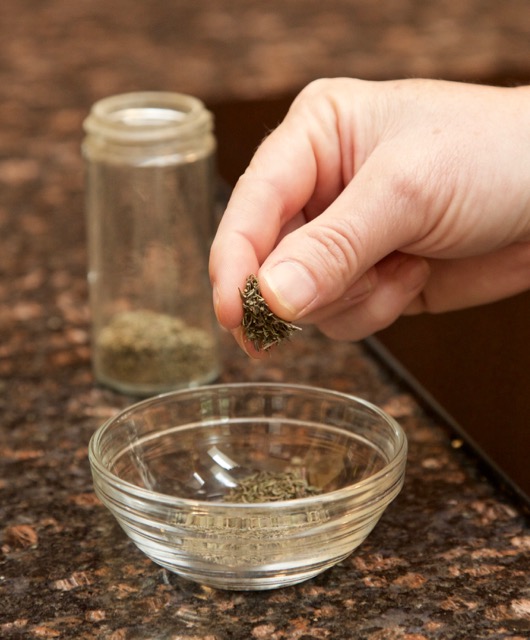
Here is a picture of my sifter. You can see that I sift the flour onto a sheet of wax paper. I level the flour off and then put it into a separate bowl. Repeating this as often as necessary for the required amount of flour. This is because I need 1 cup sifted flour. If I need to sift a pre-measured amount of an ingredient, say 1 teaspoon salt, baking soda, baking powder, or any spices, then I do that directly over my bowl.

Sifting flour.jpg

Some recipes call for sifting ingredients together. I don't personally think this incorporates the ingredients enough, so I sift each ingredient, add it to a bowl, and then use a whisk to thoroughly combine the ingredients.

Creaming the butter and sugar

If your butter and sugar are at room temperature, you have nothing to worry about. Add them both to the stand mixer and start mixing. If you are using a hand mixer or doing it by hand, mix the sugar into the butter with the tines of a fork or a wooden spoon before staring to beat so that the sugar won't fly everywhere. The goal is to add air into the mixture and make it light and airy. The hand mixture isn't a bad substitute, but get ready for an arm workout if you are using only a spoon or fork. Below are pictures of the progression of the mixture. The result should be light and fluffy.

Butter-sugar creamed 1.jpg
Butter-sugar creamed 1b.jpg
Butter-sugar creamed 1c.jpg

Adding the eggs

The next step is to add the eggs. I recommend cracking the egg into a small cup or bowl before adding it to the butter/sugar mixture. If any shell breaks off, you will be able to remove it. Add one egg at a time to the mixture and fully incorporate it before adding any additional eggs. I repeat. Add one egg at a time. Mix it in thoroughly before adding any others.

Flavoring

Typically there is a flavoring added. Vanilla extract, lemon juice/zest, or a liquor. This is added after the eggs. Add the flavoring and combine thoroughly.

Add the dry ingredients

Remember the dry ingredients you measured out and combined earlier? Now it's time to add those. Add them to the mixture a little at a time until fully incorporated. Try not to over beat the mixture because it will cause the cookies to be denser.

Other ingredients

Depending on your recipe, you may need to add chocolate chips, raisins, nuts, oats, or whatever. This is the time to do that. Again, try to just combine the ingredients and not over beat them. At this point, your cookie is made.

Back to the recipe

If the dough needs to chill, cover it with plastic wrap and put it into the refrigerator. If the cookies can be baked right away, make sure the oven is on and your pan prepared. Follow the directions for forming the cookie.

Tips on forming cookies

Pepparkakor
Lebkuchen

Roll out one pan at a time, then wash your hands. Cookie dough, especially when warm, tends to stick to the palms of your hand making it more difficult to roll out round balls. Space the cookies according to the recipe, typically 1.5-2 inches apart. Most cookies spread, so give them room.

Baking the cookies

Consult the recipe for the recommended temperature and time for baking. If you bake with only one sheet in the oven, remember to turn it back to front halfway through cooking. If you have two sheets, remember to rotate them Front to back, top to bottom halfway through cooking.

Finished baking

Once the cookies are finished baking, remove them from the oven. Some cookies need to be removed from the baking sheet immediately, others need to cool for a few minutes, and others need to have an icing applied directly to the cookie while they are still on the cookie sheet. Again, consult your recipe.

Storage

Pfeffernuesse

Pfeffernuesse

Most cookies can be stored in an airtight container in the freezer for a couple of months. Make sure you label them so you don't lose them.

Conclusion

This covers the basics of flour-based cookie baking. There's a lot more to learn, but once you have these basic steps mastered, you are on your way to becoming a great baker. By the way, these steps are also relevant to baking a cake. The only difference is that a cake has more liquid and alternates the liquid with the dry ingredients. Add 1/3 of the liquid, then 1/3 of the dry. Repeat, ending with the last of the dry ingredients.

Tags December 2016
Comment

How to caramelize onions

October 13, 2016 Samantha Mason

I have never met an onion that I didn't like, but I know that not everyone shares that sentiment. My kitchen is nearly unusable if there are no onions. I think onions improve most dishes - raw or cooked depending on the circumstances. Let's start by talking about the differences between them.

Types of onions

There are differences in the members of the onion family. Green onions, also called scallions, and chives are the mildest and are usually eaten raw.

Red onions can also be eaten raw, but soaking them in water takes away some of the bite when they are used raw in salads. The color can be off-putting when cooked especially in pasta dishes where the cooked red onion sometimes takes on a grayish hue. Shallots are a good substitute for red onions or for any occasion that needs a mild taste. They are fairly expensive however.

There is a variety of sweet onion that includes such names as Vidalia, Walla Walla, and Maui. These can also be eaten raw as they have little to no sharp bite. They are more perishable and should be used quickly or stored in the refrigerator.

Yellow onions are my favorite and a staple in my kitchen. They are have both acidic and sweet characteristics. They are perfect for caramelizing. Spanish onions, a type of yellow onion, are even sweeter.

White onions have a sharp taste and are best when cooked. Mexican cooking, however, uses the white onion specifically because of their strong taste. Think about pico de gallo, salsas, and guacamole. These dishes call for an assertive taste, and the white onion provides this.

Garlic and leeks are also members of the onion family, but are irrelevant to this discussion.

How do onions improve a dish

When I travel and have access to a kitchen, I always buy an onion. Recently I was in a situation where I had access to a kitchen, but little time and ingredients. So, I went to the grocery, actually a gas station/grocery, and bought a frozen pizza, an onion, and good-quality cheese. Yes, a gas station actually sold onions and cheese, but this is Wisconsin! Adding slivered onions and freshly grated cheese dramatically improved the pizza. It was a lovely meal because of the surroundings. Sometimes you can't have a gourmet meal, but you can make the most out of what is available.

Why should I caramelize onions

If I would have had the time to caramelize onions, the pizza would have been even better. Caramelized onions add depth and sophistication to a dish. Not every dish needs this addition, but an ordinary dish can become great. Let's look at some examples.

French onion soup is popular in many restaurants in the US. The first step to making it is caramelizing onions. I also see hamburgers with caramelized onions on menus. Look at my recipe for Grilled cheese sandwiches. One variation adds caramelized onions. Use them on pizzas or tarts or in sandwiches. Adding caramelized onions does not necessarily make it a heavy dish, but it does add depth. Caramelized onion, blue cheese, and arugula pizza is an excellent example of this. This pizza is full of flavor, but is light and elegant.

How do I caramelize onions

Little equipment and few ingredients are needed. A heavy skillet with a lid and a metal spatula are all that are necessary. Three yellow onions, vegetable oil, salt, sugar, and water are the only ingredients. The times under the pictures are for the minutes into the process.

The first thing to do is to peel the onions.

Start
Start
3 minutes
3 minutes

Cut the onions in half through the root end and slice into 1/3-inch slivers. The onions should not be too thin because they will burn easier. You want the onion to have some density at the end. If your eyes are sensitive, I suggest using rubber googles, especially when you are slicing a lot of onions. They may look silly, but they work!

5 minutes
5 minutes
Rubber goggles
Rubber goggles

Add the vegetable oil and slivered onions to the skillet. Toss to coat the onions with the oil. Turn the heat to medium-high. Turning the heat on after the onions are in the skillet will prevent premature browning. Sauté the onions until they sizzle, about 1 minute, and turn the heat down to medium. Cook until they start to shrink and become soft, about 4 minutes. Add the salt and sugar. Stir.

11 minutes
11 minutes
15 minutes
15 minutes

When the onions start to brown, add 1/2 cup of the water and stir. Scrape any browned bits from the bottom of the pan.

16 minutes - water added
18 minutes
18 minutes

When the liquid starts to simmer, cover the pan, and turn the heat to medium-low. Continue cooking, stirring about every 2 minutes to make sure the onions are not burning, about 9-10 minutes until most of the liquid has evaporated.

Remove the lid and return the heat to medium. Add more water, 1 tablespoon at a time, as necessary to keep the onions from burning. Frequent stirring is necessary as is scraping off the spatula.

Continue cooking and stirring until the onions are a deep caramel color, about 30 minutes from the time they were put into the skillet.

24 minutes
24 minutes
27 minutes
27 minutes
33 minutes
33 minutes
37 minutes
37 minutes
39 minutes
39 minutes
41 minutes
41 minutes

At this point, the onions are caramelized, but you could keep going to make them even more brown. I like a little texture left in them, but for French onion soup I would continue to cook them to get the deepest color I could without burning them. At this point, you could add 1 teaspoon of sherry to add more complexity, but it's really up to you.

43 minutes
43 minutes
Caramelized onions finished med quality.jpg

How to store caramelized onions

When you take the time to make caramelized onions, it is easy enough to double this recipe. From the pictures you can see that there is a lot of room available in the pan. So, double or triple the recipe. It may take more time, but no more effort once the onions are peeled and slivered. Freeze in small amounts in ice cube trays, put the cubes in a resealable bag once they are solid, or in larger amounts in resealable bags.

Refer to Caramelized onions for a simplified recipe.

Tags October 2016
Comment

How to make and prebake a pastry

September 23, 2016 Samantha Mason

Making a pastry can be intimidating. Most people don't work with dough often, but I cannot stress enough how easy it is once you make it once or twice. Dough is forgiving. It can be rerolled and patched if something goes wrong. With practice and patience, you can master this.

It's all about technique

I am firm believer in teaching the basic techniques of baking. Once you understand the process, you can improvise. After reading this blog you will understand the basics of making a pastry which can be used for quiches, tarts, or pies. The recipe in this blog is one that I use for quiches. It has a lot of butter and goes well with the egg filling. The recipe I use for pie is slightly different, but it uses the same technique. This recipe prebakes the pastry shell, which is also called blind baking. Pies do not need the pastry to be prebaked.

Necessary equipment

An important consideration is what equipment is necessary. A good rolling pin is important. Julia Child says, "A broom handle is better than a too-short rolling pin." I'm not sure I would go that far, but it does make the job easier. A wine bottle will do in a pinch or a clean broom handle. Rolling pins sell for about $10.

Rolling pins

For this recipe a 10-inch tart pan with a removable bottom is required. Of course you could use a smaller or larger pan. You simply need to adjust the amount of filling, but again that doesn't change the technique for making the pastry. These pans sell for about $10.

Tart pan

The only other special equipment you will need is a weight to put inside the pastry when it is cooking to keep the pastry from rising. You can spend a lot of money and buy actual pie weights. Some even come with handles. Or you can just use raw lentils or beans. I use lentils and keep them in a resealable bag to be used over and over. You just need something to spread over the entire bottom surface of the pastry. You will use aluminum foil to prevent the weights from touching the pastry.

Pie weights

The ingredients

1 3/4 cups all-purpose flour
1 teaspoon salt
12 tablespoons butter (1 1/2 sticks)
1/3 - 1/2 cup cold water

The equipment

10-inch tart pan       Medium bowl
Rolling pin                Measuring spoons
Pie weights               Spoon
Wax paper                 Knife
Measuring cups - dry and liquid

Measuring the ingredients

The flour must be measured correctly. Use the spoon and level technique. If you dip your measuring cup into the flour container you are likely to get too much flour because it will be compacted. Spoon the flour into your measuring cup and level it with a butter knife.

Making the pastry

Add the salt and flour to a medium bowl. Mix thoroughly. You want the salt to be evenly distributed.

Now it's time to cut in the butter. The purpose of this is to distribute the fat into the dry ingredients. You can do this by hand or with two knives. For both methods, cut the butter into small pieces and drop into the dry ingredients. If by hand rub the butter between your fingers until all of it becomes the size of peas. If using two butter knives have one in each hand. Start the knives on opposite sides of the bowl and drag them towards each other cutting the butter as you go. Continue until all the butter is pea-sized. This technique is demonstrated in this video for making Pete's biscuits.

Add just enough water for the dough to come together. It's important that the water be cold so that the butter won't melt. Pour the dough onto a section of wax paper. Scrunch the dough together. The reason for the wax paper is to keep the heat from your hands from melting the butter. Try to handle the pastry as little as possible. You want the pastry to be completely mixed but don't over work it.

Pastry barely mixed.jpg
quiche pastry.jpg
scrunching pastry.jpg

Once the dough is combined, flatten it out, wrap the wax paper around it, and cover it tightly with plastic wrap. Refrigerate for at least 1 hour and up to 2 days. The purpose of this step is to relax the gluten for a more tender pastry. If you used unbleached all-purpose flour, the pastry may turn a gray color, but that will not affect the taste.

Pastry in wax paper on the way to the refrigerator

Pastry in wax paper on the way to the refrigerator

Pastry for pies

Most pies do not require prebaking before using. Consult the main recipe to see if prebaking is necessary.

Rolling out the dough for a quiche

Remove the dough from the refrigerator. It may seem hard, but do not let it warm up. If necessary hit the dough with your rolling pin to soften it. Lightly flour your workspace. Roll the dough out to about 1/4-inch thick and 2 inches larger than your pan. Roll from the center of the pastry to the edges. You want the dough to be the same thickness in the center and the sides. Turn your dough over occasionally to prevent it from sticking.

If you have a problem put the pastry back into the refrigerator. The dough will be slightly tougher because you are working it more, but this is a learning experience. Keep trying. It will work.

Pastry before it is baked

Pastry before it is baked

Carefully put the dough into the tart pan and press the dough into place. With your rolling pin roll over the top of the pan to remove the excess dough. The dough should be level with the top of your pan. Prick the bottom of the pastry with a fork. Cover and refrigerate 30 minutes. Again, we are trying to relax the gluten. Save any pastry scraps. Put them in a resealable bag and refrigerate. You made need to patch your pastry later. If you don't need the leftover pastry, roll it out, cut it into 4x2-inch pieces, sprinkle it with cinnamon sugar, and bake at 375º until golden brown, about 10 - 12 minutes.

Uncooked little things.jpg
Little things baked.jpg

Preheat oven to 450º. Remove the tart pan from the refrigerator. Line it with aluminum foil. Put the pie weights on the foil. Make sure the weights go to the edge.

Lentils used as pie weights

Lentils used as pie weights

Prebaking the pastry

Bake the pastry for 7 minutes. Carefully remove the foil and weights and prick the pastry again. If the pastry has fallen down the sides carefully push it back into place. If necessary use some of the pastry scraps that you saved to patch any empty spots. Put the foil and weights back onto the pastry. Cook for 3 more minutes.

Carefully remove the foil and prick the pastry again. Cook for 3 more minutes without the weights until it is lightly browned. Remove from the oven. The pastry is now ready to be filled.

Tags September 2016
Comment

Shrimp potstickers

August 9, 2016 Samantha Mason

My family and I were in Hong Kong for a week, and decided to take a cooking class on Chinese dumplings. Ever since then I have been fascinated by them. I love the texture and the sauces that go with them. Sometimes I make multiple sauces because I like really spicy food, while the rest of my family doesn't. Other times I simply make a basic soy dipping sauce and add Sambal Oelek chili paste to my sauce.

It is not hard to make your own dough for the wrappers, but it is time consuming and does require more equipment and patience. When I am in a hurry, I simply use wonton or gyoza wrappers. Store them in the freezer and thaw them in the refrigerator overnight. I also keep shrimp in my freezer and thaw them overnight or in a bowl of cold water, if I'm in a hurry. Leave the shrimp in the bag and submerge the bag in water. Most of the rest of the ingredients are staples in an Asian pantry.

Equipment

The equipment needed for this recipe is minimal. A large frying pan, preferably non-stick, with a lid, a pastry brush with a small bowl of water, a wet kitchen towel or two, a platter sprinkled with cornstarch, and a baking sheet are all that you will need. If you don't have a pastry brush, simply use a wet cloth to wipe the wonton wrappers.

Once you get the hang of it, the assembly goes quickly, but give yourself plenty of time when you are first starting out. And please remember to utilize the mise en place principle.

Making the sauce

1/4 cup soy sauce                                          1 teaspoon sesame oil, spicy or regular
3 tablespoons rice vinegar                            1 teaspoon sesame seeds, toasted
1 tablespoon water                                        2 teaspoons chopped cilantro
1 teaspoon Thai chili sauce paste

I find that it's best to make the sauce first and refrigerate it. The only difficult part about this recipe is toasting the sesame seeds, which is not exactly required, but I do find that it enhances the flavor. Put the sesame seeds in a small pan and toast over low heat, shaking frequently. Please do not leave them unattended because they will burn quickly. Let them cool slightly. After the seeds are cooled, simply combine all of the ingredients and stir. The sauce can can be made 1 day ahead. Refrigerate if the sauce is not going to be used within the next hour or so.

Preparing the shrimp filling

1 tablespoon finely minced ginger                                         1 teaspoon sesame oil
1 teaspoon finely chopped garlic                                           1 teaspoon Thai chili garlic paste
1 tablespoon chopped chives or green onions                      2 teaspoons dry sherry or wine
1 tablespoon chopped cilantro                                               2 teaspoons oyster sauce
2 teaspoons cornstarch mixed with 1 tablespoon water        1 teaspoon soy sauce
1 pound raw shrimp, peeled, deveined, and finely chopped

1 - 3 tablespoons vegetable or peanut oil                                                                
32 wonton or gyoza wrappers
cornstarch, for sprinkling the platter

Combine all the ingredients except the vegetable oil, wonton wrappers, and cornstarch for sprinkling. Combine thoroughly, cover, and set aside. Refrigerate if not using immediately.

Working with the wrappers

Have a wet kitchen towel or paper towels ready. These wrappers dry out quickly, so you want to keep the package covered as well as any prepared dumplings. Until you become familiar with the process, work with only 5 - 8 wrappers at a time. This should insure that they won't dry out. As you become more experienced, work with up to 12 wrappers at a time.

Lay 5 - 8 wrappers on the counter in a grid pattern. Working quickly, spoon about 1 1/2 - 2 teaspoons of filling into the center of each wrapper. You want enough filling to give your dumplings taste, but if you put too much in, then they will not seal and will open when you cook them.

Dip your pastry brush in the water and brush the four sides of each of the wrappers. Again, working quickly. Once all four sides are wet, pick one up and start folding it. Bring two of the opposite sides together and pinch them; this will form a triangle. Pinch closed both of the sides. The wet sides are what will help seal them. Take the other two corners, not the one that you just pinched together, and now pinch them together in front of the wrapper.

Put this on the platter lightly sprinkled with cornstarch and cover with a wet towel while you fold the remaining wrappers. Continue this process until all 32 wrappers are filled and folded.

Time to cook the dumplings

Preheat the oven to 200º. Put a baking sheet in the oven. The cooked dumplings will be transferred to this sheet to keep warm while the rest of the dumplings are cooked. 

Heat 1 tablespoon of vegetable or peanut oil in the large frying pan over medium-high heat. If the pan is not non-stick, you will need enough oil to provide a thin layer of oil on the bottom of the pan. Place only enough dumplings in the pan that will comfortably fit. Do not crowd the pan. Cook until the bottoms are brown, about 2 minutes. Pour 1/2 - 3/4 cup water in the pan and cover. Cook about 5 minutes. Most of the liquid will evaporate. Transfer the cooked dumplings to the baking sheet and keep warm in the oven. Repeat with the remaining dumplings, adding more oil as necessary.

Once these are pan-fried, they are called potstickers because they sort of stick to the pot. If they are steamed only, then they are called dumplings. That's all there is to making potstickers. Once you get the hang of it, it's really fun. Serve these hot with the sauce on the side.

Click to see the Shrimp potstickers recipe.

Tags August 2016
Comment

Roasted chicken

July 10, 2016 Samantha Mason

Introduction

        In my mind there is nothing easier or better tasting than a roasted chicken. In its basic form, it is so simple to make and practically hands off. Roast one or two chickens on Sunday afternoon, and you will have food for many meals. Chicken sandwiches for lunch, chicken enchiladas for dinner, chicken soup...You get the idea.

Choosing a chicken

         For my family of four with two teenage boys, two six-pound chickens is a good amount. This allows us to eat roasted chicken on the first night, and then have enough leftovers to use throughout the week. For a smaller family, this would obviously be too much.
        
When you buy a chicken, look at the weight, price per pound, and also the expiration date. You want to make sure to get the correct size for your needs. If you are cooking two chickens at the same time, try to buy them of equal size so that they will cook in the same amount of time. Look at the price per pound. Prices do vary from area to area and over time, so I will not give specific numbers here, but be aware that a roaster will be more expensive than a broiler or fryer. Also, organic will be more expensive. Just look at the prices and make an informed decision. As you become more familiar with roasted chicken, you can decide if a more expensive one tastes better. Finally, check the expiration date. There is nothing worse than returning home to find a chicken with an expired date. I'm speaking from experience here!

 I bought the chicken now what? 

        As soon as you return home, put the chicken in the refrigerator or freezer unless you are going to cook it very soon. Leave the chicken at room temperature for 1 hour before roasting it. This will help cook the chicken a little faster. This isn’t long enough to bring it completely to room temperature, but I don’t like putting a cold chicken into the oven. There are a lot of opinions about this. I’m just telling you what I do.

Mise en place

        Mise en place is a French term meaning “everything in its place.” Before touching your raw chicken, have everything ready so that you don’t have to stop and wash your hands multiple times because you forgot something.
        The first decision is what pan to cook it in. In an ideal world, you would cook your chicken on a rack, but many beginner cooks don’t have one. You may simply roast the chicken in a roasting pan or a cast iron skillet. Or you can use carrots as a base, and you will then have roasted carrots to serve with your chicken. Cooking with a rack or on top of carrots allows air to circulate around the chicken.
        So, get out your pan. If you are using a rack, I suggest using a non-stick spray or rubbing it with vegetable oil to prevent sticking. If you decide to use carrots, peel the carrots and halve them lengthwise.

carrots in pan.jpg
rack in pan.jpg

        Tear paper towels into segments and place by your workspace. When your hands are dirty from the chicken, it isn't easy to tear off them off. You can use dish towels as well and then throw them in the wash, but for most people starting out, paper towels are the way to go. You may need scissors for opening the chicken packaging.
        Have a small bowl with about 1/2 - 1 tablespoon of olive oil in it. Choose your herb or spice for your chicken. See the Variation section of the Roasted chicken recipe for ideas. For now, let’s use dried thyme. Put about 1 teaspoon of dried thyme in a small bowl. Release the flavors by rubbing the thyme between your thumb and index and middle fingers. It should smell more fragrant. Put about 1 teaspoon of salt and 1/2 teaspoon of pepper in the bowl with the thyme and mix thoroughly. This is to keep you from contaminating the salt and pepper shakers when you have just handled the raw chicken.
        You now have everything in one centralized location preferably near a sink - your pan with a rack inserted or lined with carrots, olive oil, spices, paper towels, and scissors. You will also need a small bowl for the giblets and a cutting board. Mise en place accomplished.

paper towels.jpg
releasing spices.jpg
mis en place chicken.jpg
mis en place chicken 2.jpg

 Oven temperature and timing

        There are many opinions on how long to cook a chicken and at what temperature. Many people use the rule of 20 minutes per pound. I follow Julia Child’s rule of 45 minutes plus 7 minutes per pound. In this blog, we are going to use a 5 pound chicken. This means that we will roast the chicken for a total of 80 minutes. I start the chicken off in a hot oven of 425º, which does a nice job of browning it. After 30 minutes, I turn the temperature down to 375º for the remainder of the cooking time.
        There are other conditions to take into account. If the chicken hasn’t been at room temperature for an hour, add another 5 minutes or so. If it has a stuffing, add another 10 - 20 minutes. A convection oven cooks faster than a conventional oven. Some people lower the temperature by 25º - 50º as well as cutting down the time. After much experimentation, I find that cutting 7 - 10 minutes off the time works. If you like your chicken more well-done, and some people really do, add another 5 - 10 minutes.
        Julia Child as well as others say to allow the chicken to rest 10 - 20 minutes after cooking. Personally, I don’t see that this does much good, although honestly I never seem to carve immediately upon taking the chicken out of the oven either; I just don’t consciously plan a rest period.
       Now that you know how long to cook your chicken, preheat your oven to 425º.

Finally working with the chicken 

        We are ready to approach the chicken. A raw chicken can be intimidating the first time you cook it. Don’t be afraid, it will not hurt you. It is important to be careful when dealing with raw chicken because of contamination. Please be smart and wash your hands often and contain your chicken to a localized area to make cleanup easier.
        There are many different theories on whether to wash a chicken or not. I’ve read that chickens are washed and put into food-proper packaging and therefore do not need to be washed. The argument being that by washing your chicken you are contaminating your sink and introducing unnecessary risk. I’ve gone back and forth on this issue, but I do wash my chicken. I simply thoroughly clean my sink immediately after the chicken goes into the oven.
        Put the packaged chicken into your sink and open it, leaving the packaging in the sink. Some chickens will have a package of giblets in the cavity. Check the cavity of your chicken. If there is a bag of giblets, remove it and place it in the mise en place bowl.

        Rinse the chicken thoroughly inside and out. Turn it upside down to let as much liquid drain out as possible. Using your paper towels, dry the chicken inside and out. Leave the dirty paper towels in the sink.
        Place the chicken on your cutting board. Take the bowl of olive oil and pour it over your chicken. With your hands, rub the olive oil all over the chicken, top and bottom. Place the chicken in the pan with the breast up. Wash your hands thoroughly.
 
       Take the bowl of seasonings and sprinkle it over the top of the chicken. Your chicken is now ready for the oven.


To stuff or not

        I was taught to always truss my chicken because it looks better when it comes out of the oven, and I certainly agree with this. For me, however, it isn’t worth the effort. I find the skin is crispier without trussing, especially around the legs, and it is certainly easier and faster not to truss. The downside is that the chicken isn’t as pretty and occasionally one of the legs may fall off. In my experience, this rarely happens unless the chicken is overcooked.
        There is a compromise, and that is to use cooking rubber bands. Do not use regular rubber bands because they will melt. The downside to the rubber bands is that they are hard to remove when hot and since they are reusable, you don’t want to cut them.
        It is your decision whether to truss or not, but those directions are outside the scope of this blog.

        Cooking rubber bands

        Cooking rubber bands


To baste or not

        If you want the experience of cooking a chicken to be as simple as possible, then don’t even think about basting. If you want a beautifully golden chicken and have the time, I would suggest basting. It doesn’t take that much time and does improve the crispiness of the chicken skin.
        After you turn the oven down to 375º, pull the chicken out of the oven, and place it on a heat resistant surface. Using a heatproof brush, dip it into the liquid in the bottom of the pan and brush the chicken. I find there isn’t a lot of liquid at this point, so you may want to brush it with a little more olive oil. I set a second timer for 20 minutes. I do this so I don’t forget when the chicken is done. I baste the chicken every 20 minutes until the chicken is cooked.

                                                         Heatproof basting brush

                                                         Heatproof basting brush


While the chicken is cooking

        When your chicken is in the oven, it is time to deal with the giblets and clean your work surface. If you don’t want to use the giblets to make stock or cook the liver, then throw the bag away. See below for how to use the giblets. 
        Throw the chicken packaging and paper towels into the trash.
        Fill the sink with hot, soapy water and wash the items that came into contact with the chicken - scissors, cutting board, bowls for the olive oil and spices. Wipe the counter thoroughly. Put any contaminated towels in the laundry, and you are now finished with cleaning up the raw poultry.

What to do with the giblets

         If you are using the giblets, work with them before cleaning up. Typically, giblets contain the neck, heart, liver, and gizzard. Sometimes a kidney will be included. For the liver, you can sauté that in butter with onions and eat it on a cracker. You can store the liver in a small bowl covered with water in the refrigerator to use within a day. Or you can put the liver in a container in the freezer and save it until you have a half a pound in order to make a Chicken liver pate.
        The rest of the giblets can be used to make stock.

Making stock

         If you are making gravy, you will want to make a stock from the giblets. The liver should not be used to make stock. If you are not making gravy, save these items and put them a resealable bag in the refrigerator. After carving the chicken, use the carcass along with the giblets to make stock.
        Put the heart, kidney, gizzard, and neck in a saucepan. Cover with water. Bring to a boil. Skim any brown foam from the top. Reduce the heat and let simmer about an hour, watch to make sure the pan doesn’t run dry. After you have skimmed the foam a few times, add a peeled carrot cut into 2” lengths, a quartered small onion, a bay leaf, some peppercorns, and some parsley. I don’t add salt to my stock. I wait until I use the stock in something and season that dish.

It’s out of the oven

        The timer says that the chicken is done. Pull the pan out and put it on a heatproof surface. After a few times roasting a chicken, you will have the timing down and know when your chicken is finished, but it never hurts to cut into the chicken to make sure that it is done. Raw chicken is not something you want to eat.
        Cut between the drumstick and breast, pulling the leg to the side. The juice should be clear. If it is still pink, then put the chicken back into the oven until the juices are clear.

What about making gravy

        The next decision is whether to make a gravy or not. All you need for this is flour, stock, and the pan in which the chicken was cooked.
        Remove the chicken from the pan and put it on a cutting board, lightly tenting it with aluminum foil, if you wish. If you used a rack, remove it. If you used carrots, remove them to a covered dish to keep warm.
        Put the pan on medium heat and stir using a whisk, wooden spoon, or spatula to release any bits stuck to the bottom of the pan. Eye up the amount of fat/liquid that you have in your pan. If you have about 2 tablespoons, you will use that much flour. I usually start by adding 1 tablespoon of flour at a time and stir that in with a whisk to prevent clumping. I add enough flour to make a slightly thick paste. Cook for a couple of minutes to cook the flour. Add ladles of hot stock, one at a time, to the pan and whisk. Continue adding the liquid until the gravy is the desired thickness. Season with salt and pepper.

How to carve a chicken
        Please watch iwannabeacook's video on Carving a roasted chicken.
        This is the hardest part of roasted chicken, but with time, practice, and patience you will master this skill. Don’t worry about cutting it perfectly. Each chicken is different and will therefore be a slightly different experience. The chicken will be delicious, so just relax and do the best you can.
        Put the chicken on a cutting board that has an edge so that the juices don’t run over the side. These juices can be added to the gravy or poured over the cutup chicken. Put the breast facing up with the cavity towards you. Cut off the tail.
       Cut into the chicken between the breast and the drumstick. This is where we tested to see if the juices were running clear. Separate the entire leg from the rest of the chicken and cut through the joint. Repeat on the other side. Cut between the drumstick and thigh. Your knife should be at an angle about parallel with the drumstick. Repeat with the other leg quarter.
        Turn the chicken around so that the wings are in front of you. Slice through the breast just above the wing and cut through. There will be some breast meat attached to the wing. Repeat on the other side.
        Only the breast remains at this point. Use your knife and cut down the cartilage separating the breast. Slide your knife down and separate the breast from the carcass. Repeat on the other side.
        You now have an empty carcass. There is some meat on the back of the chicken, in little pockets. You must use your fingers to get this out, but since the meat is by the bone it is delicious. I use this meat for soup or chicken salad.

        Follow the simplified directions in the Roasted chicken recipe.

        In conclusion, I hope that you enjoy roasted chicken as much as I do. Experiment with seasonings, take notes, and find what works for you.

Tags July 2016
Comment

Sign up for the weekly blog posts

Thank you!


Blog archives

Cooking blog archives

About     Blog     Contact     Home     Photos     Recipes     Register     Tips     Tags             

      
Copyright © 2025    Samantha Mason    All rights reserved